Making Of Toon Tiger Rig.

Making Of Toon Tiger Rig.
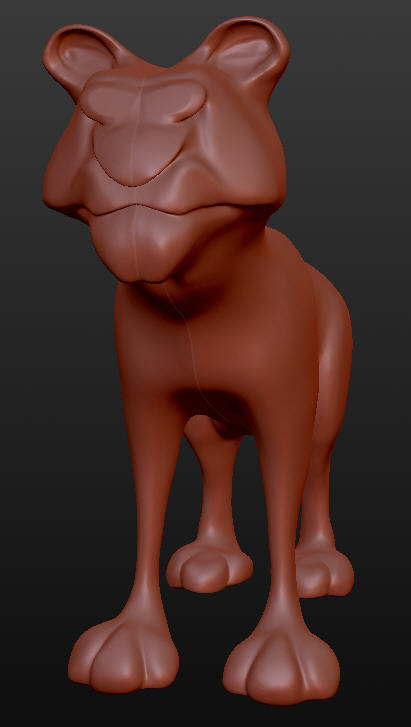
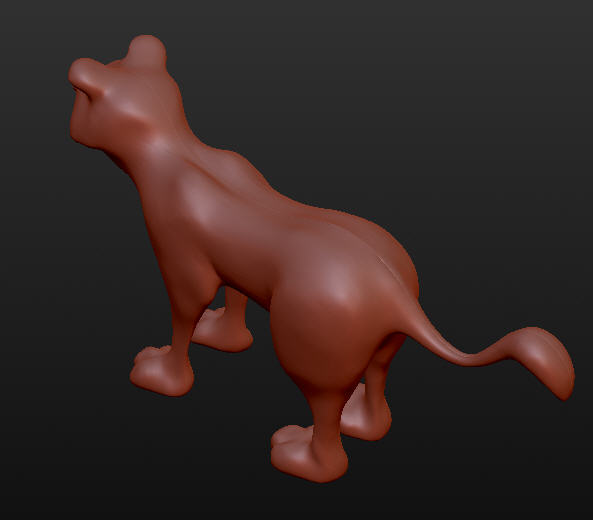
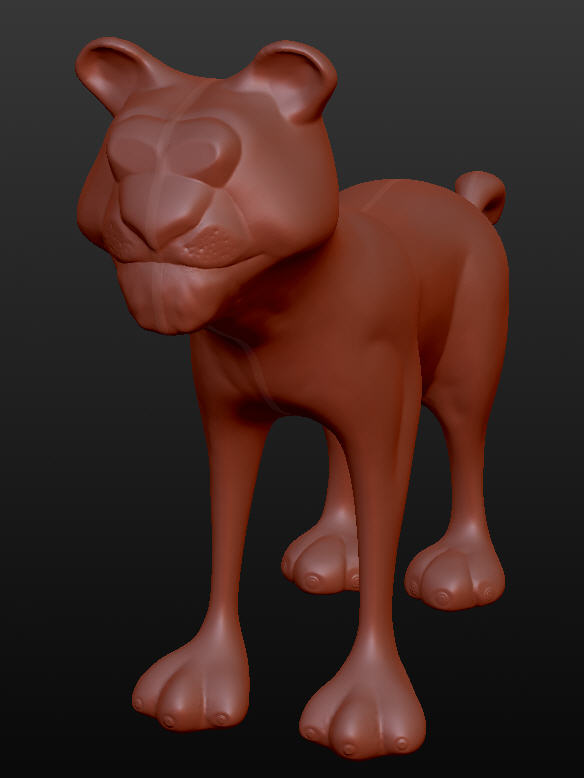
Usually I focus completely on rigging and animation, but I want to branch out into creating complete characters from scratch. I've started using a sculpting program called Sculptris recently and modeled a cartoony tiger model with it that I thought would be a good one to start with. Here's a breakdown of the process of turning this into an animation-ready character. Step 1 was modeling a hires mesh in Sculptris. What's great about this is that you can concentrate on shapes and proportions and leave the technical stuff like polygon density and topology to one side. Here's a couple of images of the original sculpt. |
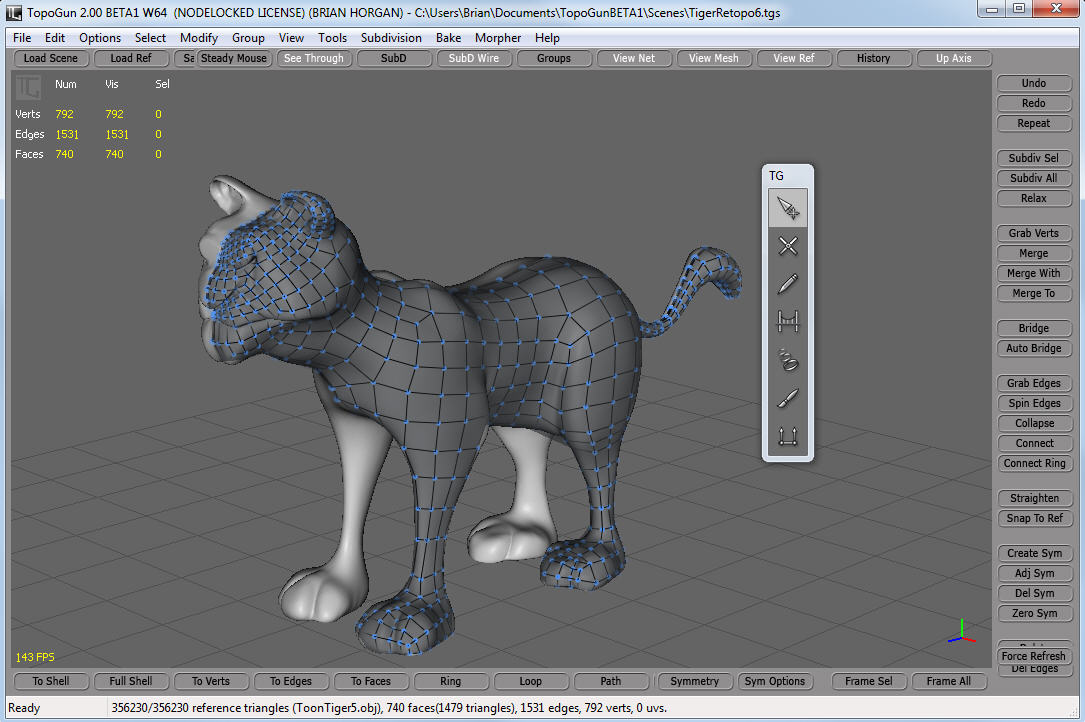
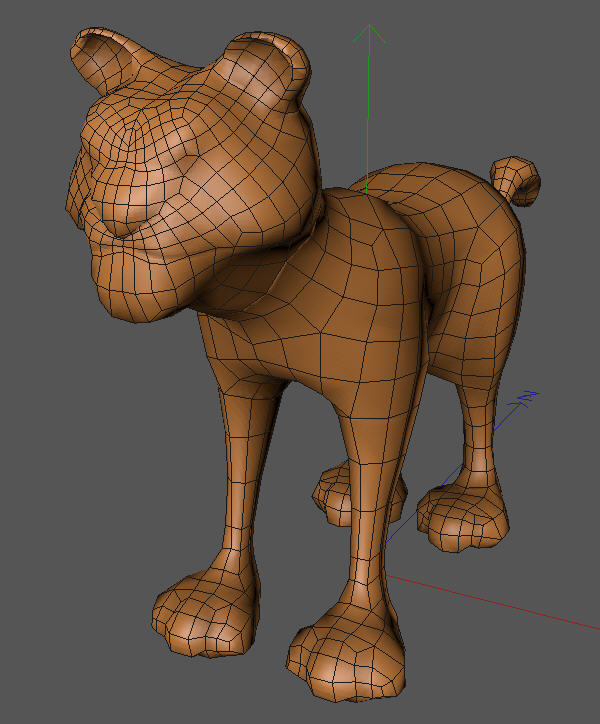
The next step was to build a low poly version of this mesh that would be suitable for rigging. I did this using a program called Topogun. The result of this was a nice clean mesh with just 1480 polys. (The original sculpt had over 60,000) |
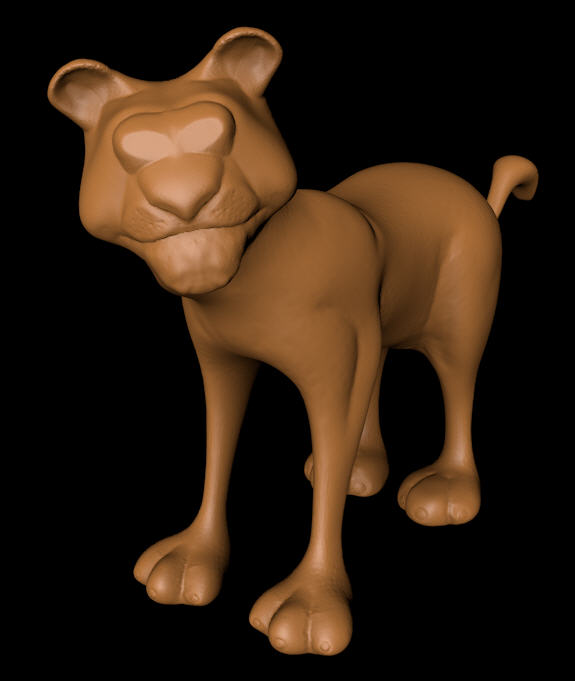
Next I made some minor tweaks to the low poly mesh in Cinema and exported it back to Sculptris, subdivided it and sculpted in some finer details |
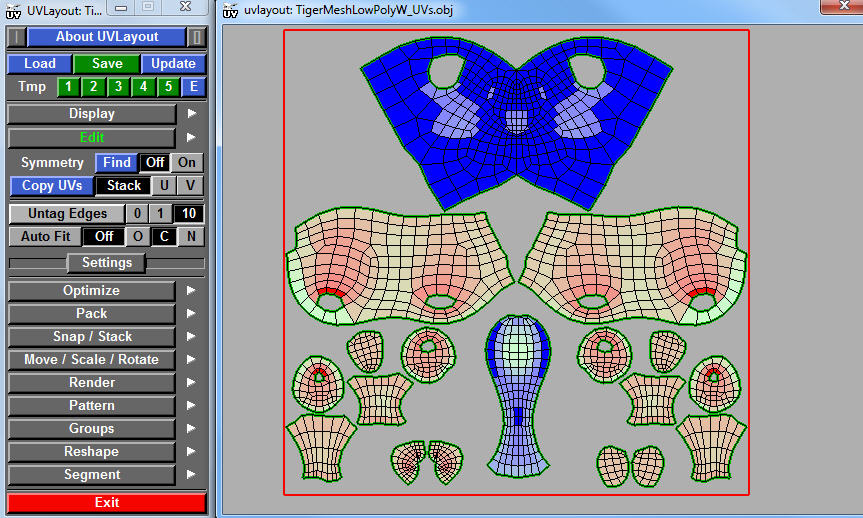
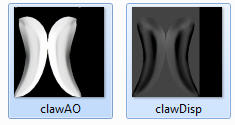
With the low poly mesh UV mapped I then brought it into Topogun and baked out the difference in detail between the high and low poly versions to Displacement maps. I also created an Ambient Occlusion and Cavity map in Topogun. Here's what the low poly version looks like in Cinema, alongside a render with the displacement map applied. |
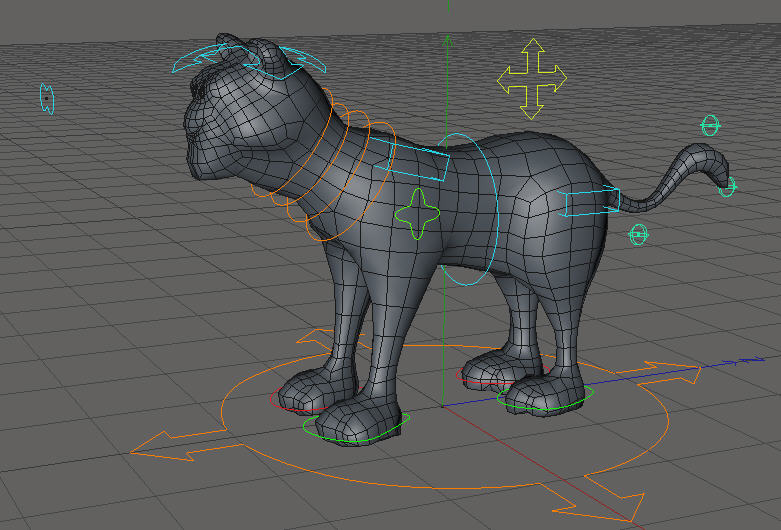
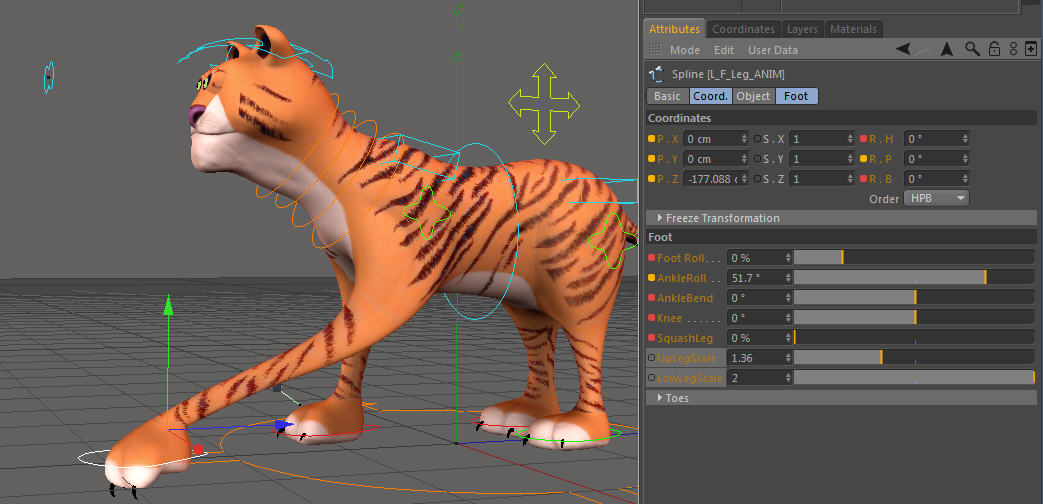
I then started sketching out the basic rig, using the new Builder in Cinema 4D R13. I used the Quadruped template as the base for it but made a few changes, in particular to the spine rig, based on methods demonstrated by Javier Solsona in his 'Quadruped Friendly Rigging' DVD. Other features I added to the rig include no-flip knees, squash controls for the legs (great for polishing IK pop out of walkcycles) and rigged the head so that it follows the rotation of the body rather than the neck, this reduces counter animation. I also added shoulder controllers and joints for the ears and claws and used PoseMorph tags to create easy to animate poses for them. For this rig I deliberately focused on the body and didn't rig the face but I did include a 'look at' control so that I can point the eyes. |

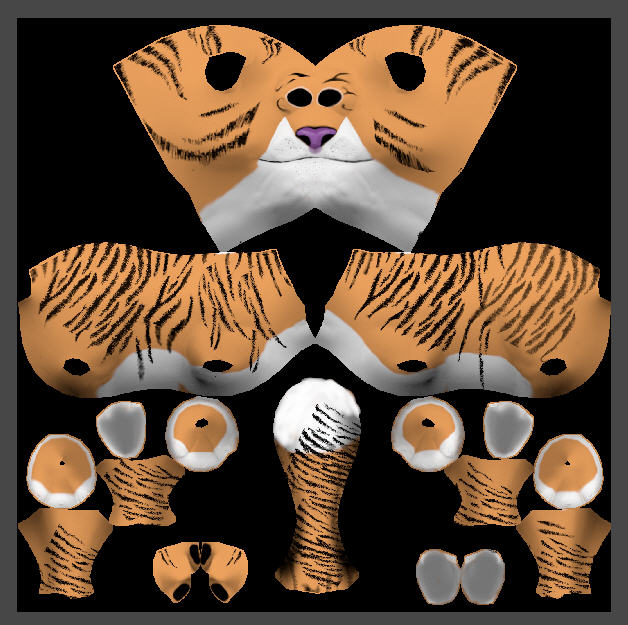
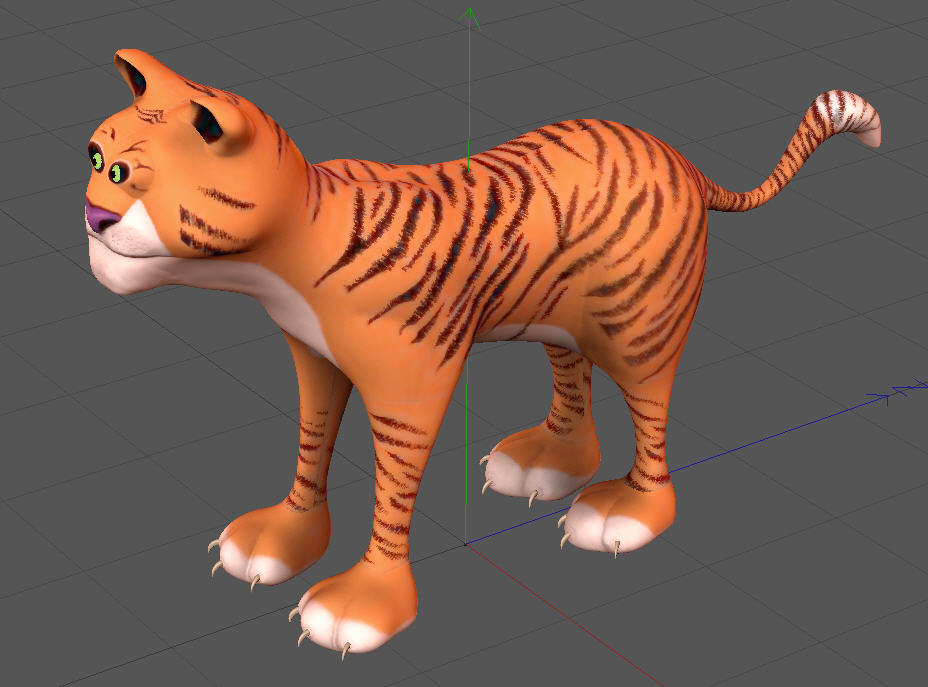
Last thing to do was to give the character a coat of paint, so I brought it into Bodypaint and painted the color map, using lots of layers. Here's an image of the texture map, I did a lot of projection painting for this, particularly for the stripes. |
Now it gets to the fun part, testing and animating. I usually create a rough walkcycle while polishing the skin weights and am doing that right now. I'll post the results when it's finished. In the meantime here's a very rough pose test (just the auto weighting here) |

And here's a short video showing the basic functions of the rig. I think this guy is going to be fun to animate. A few extra details I plan to add will be claws and whiskers, which I'm going to model as separate objects and rig to follow along with the main mesh. |
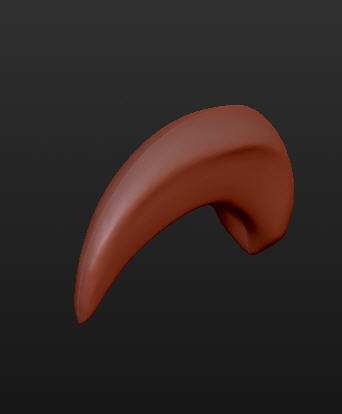
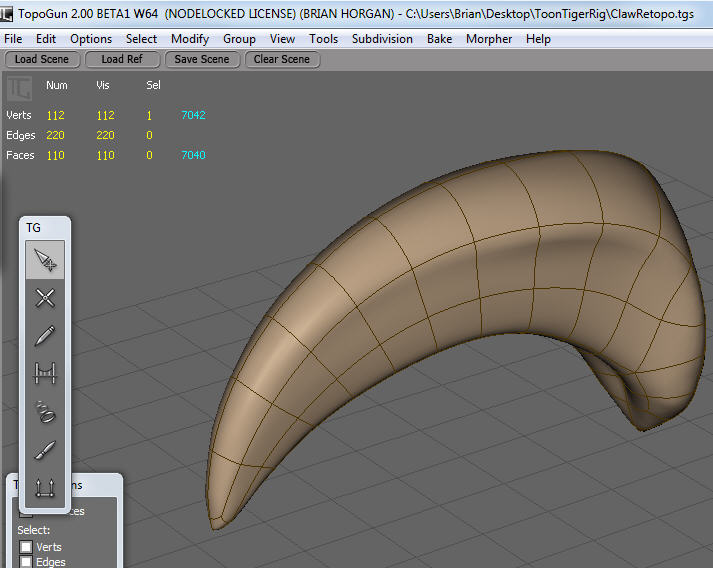
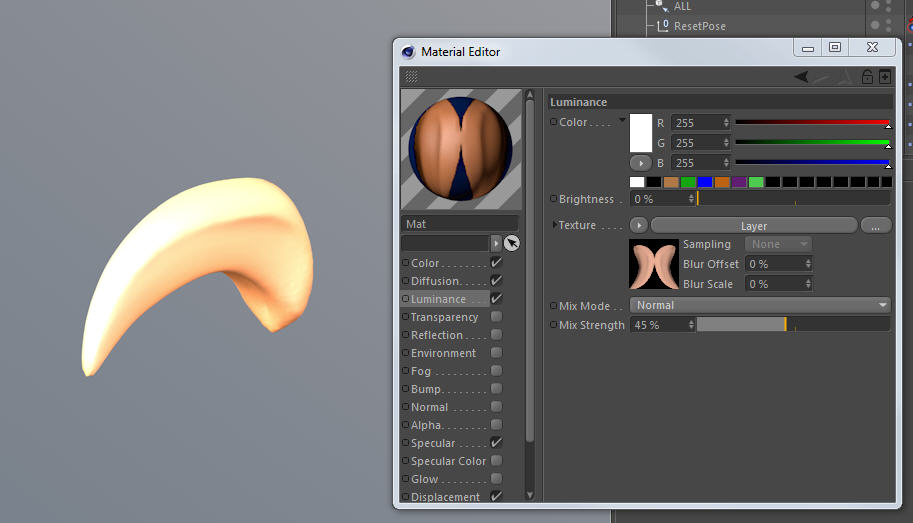
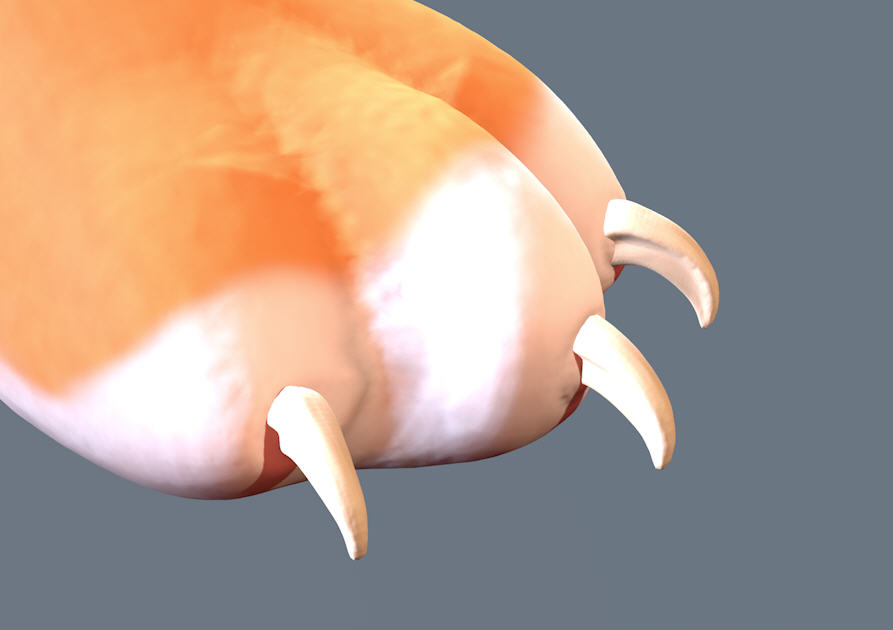
Today I added the claws, I used pretty much the same method as the tiger body : Started with a sculpt in Sculptris and then did retopology of that in Topogun. Going for a pretty exaggerated look here, to suit the character style. |
Last thing to do was to try them on.. now he's a proper cat! Still tweaking the positioning and materials but the basics are there I think. Going to get back to animation now, should have a walkcycle to post soon. |
First animation test, a basic walkcycle. Nothing too exciting but a good chance to test the rig which is working well. Next there are a couple of minor tweaks I want to make to the weighting here and there and then I'll move on to something more fun, like a full on run-cycle. |
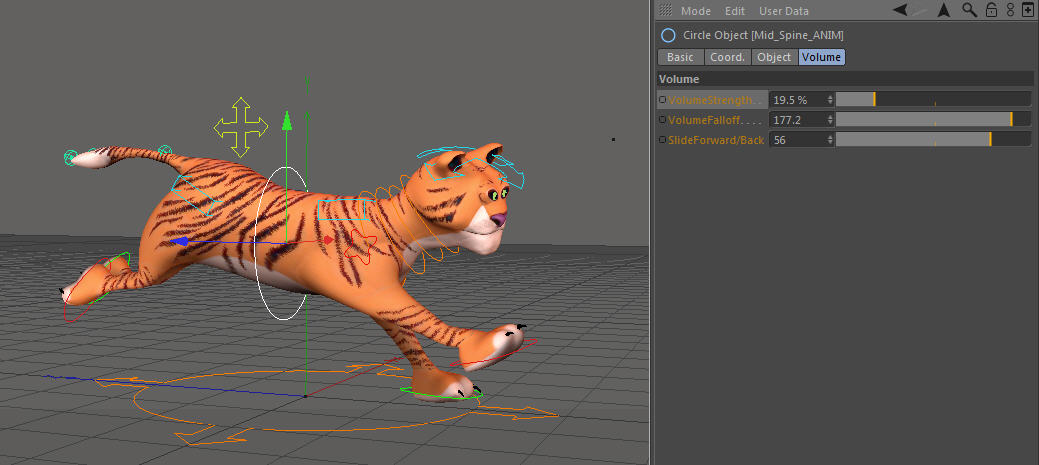
I've started working on a cartoony run-cycle with the tiger and realized that it would be nice to be able to add more volume to the torso in certain poses, both to preserve the volume and also for pushing towards more extreme cartoony shapes. Just adding a corrective morph or two would probably work ok but I wanted something more flexible than that, so I put on my rigging hat and came up with this setup. It gives a lot of control over both how much and where the volume is added as well as a falloff for it. All of these parameters are animatable and it will work predictably no matter what pose the rig is in. I'm not going to go into detail about how this works under the hood, but if you attend my lecture at the Maxon UK training day (London October 17) I'll be demonstrating, amongst a lot of other things, how I set this kind of thing up ; ) Here's a video showing the volume controls in use. |
One last (?) addition to the basic rig, individual controls for scaling the limbs in the legs, these work alongside the squash controls, again more options for cheating and pushing poses. Not something I'd include on a realistic character rig since our bones tend to stay the same size usually : ) I also added controllers to move the back legs positions individually, again it's all about the shapes in motion with cartoony characters, not so much the actual anatomy. Here's a video showing the leg scale controls. |
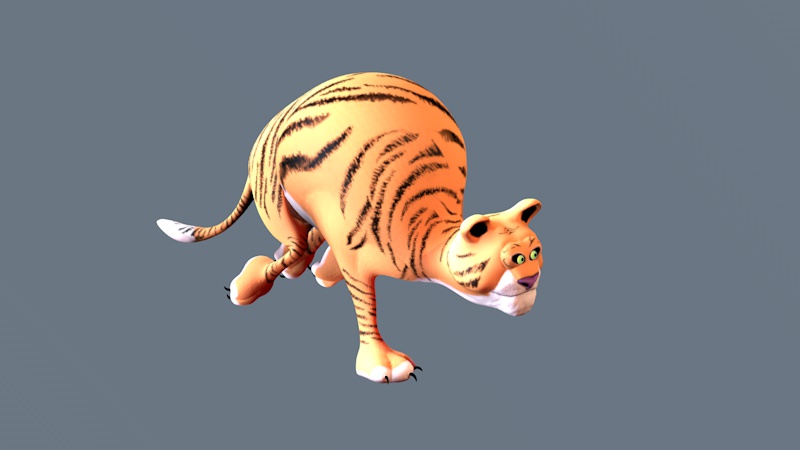
Back to working on the run-cycle next. I think there's definitely enough flexibility in the rig now to cope with that. Here's a silly pose where I had some fun pushing that volume control to extremes. I think this cat has had too much lasagne possibly. Rendered in R13 Physical render, with physical sky and SSS shader. |
----------------------------------------------------------------------
Please visit the rest of my site to see my animation and rigging work with Maya and Cinema 4D
All work on this website (C) Brian Horgan 2012. All Rights Reserved.
----------------------------------------------------------------------
----------------------------------------------------------------------